MDXOnline004 Ondemand WiFi Repeater


日本語 English

Download 20240509_MDXOndemand.7z 2024/05/09 (2,679,908bytes) MD5:d81aaf352ef5637ab82eed1e4a25b335

Old version 2024/04/21 2024/04/29

YouTube development diary


- Overview

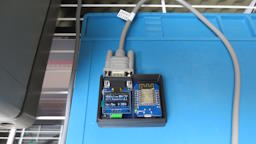
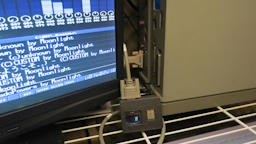
This is a microcontroller designed to comfortably play MDX using joystick port #2 of X68000.
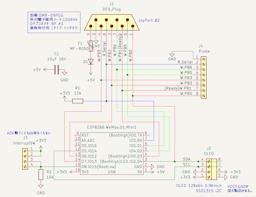
Actually, I just rewrote the physical layer of yunkya2's x68kserremote from RS232C to joystick port.


- Necessary things

X68000 (10MHz) main body.
WiFi (2.4GHz) connection environment.
Straight all-connection cables with "D-Sub9pin female" on both ends.
The operation of the cable was confirmed with "Sanwa Supply RS-232C cable (for modem/TA) 0.75m KRS-433XF-07K".
No Windows machine required.


- Specifications

Target computerSHARP X68000 (10MHz only)
Target OSHuman68k version 3.02
MicrocomputerWeMos D1 Mini ESP8266 4MB
WiFi communicationIEEE 802.11 b/g/n 2.4GHz only
X68000 transmissionSoftware serial UART N81 330251bps
X68000 reception6bit parallel about 180kbytes/sec
Actual throughputAbout 160kbytes/sec (simple measurement using X68000 ACE)


- Setup method

Copy "mdxo004.sys" to the system disk and register "mdxo004.sys" in "CONFIG.SYS". (The order doesn't matter)
DEVICE=\mdxo004.sys

After rebooting, move to the added remote drive and run "Status.x" to check the operation.

"Setup.x -SSSIDName -PPassphase" Set the SSID and pass phase of the WiFi you want to connect to.

Please run "Status.x" again and check the WiFi settings.
It's OK if both "SSID(WiFi)" and "Pass(WiFi)" are "Prepared".


- How to use

Run "Setup.x -C" to start the WiFi connection.
The settings are saved in the microcontroller, so after setting, start up, move to the remote drive, and connect by simply typing "Setup.x -C".

I think everyone has their own preferences regarding MDX playback environment, but I would appreciate it if you could refer to "MDX1MB.BAT" (for 1MB of memory) or "MDX2MB.BAT" (for 2MB or more of memory).

Only when there is no floppy disk in Drive 1, the access lamp of Drive 1 flashes green during file transfer.


- Initialization method

When you power on the device and see ‘Boot...’ displayed on the OLED screen, press and hold the yellow button for 15 seconds to initialize the microcontroller.
The SSID and pass phase are saved, so be sure to initialize them before transferring or discarding them.


・MMDSP key map (excerpt)

[↑] [↓] [8] [2]Move cursor
[ROLLUP] [ROLLDOWN]Move cursor fast
[HOME] [/] [F1]Move cursor to first line
[DEL] [*] [F2]Move cursor to last line
[RETURN] [ENTER]Play or change directory
[UNDO] [.] [0]Go to parent directory
[\]Go to root
[TAB]Start DOC viewer (only files with "(DOC)" mark)
[SPACE]Play and move cursor down
[BS]Move cursor up to play
[A] [S] [Z] [X]Set to "Auto", "Shuffle", "Repeat", and "Intro" respectively
[;] [.]Increase/decrease the number of loops ("LT" on the bottom right)
[]] [_]Intro time increase/decrease (lower right "IT")
[F6]Replay from the beginning of the song
[F7]Suspend/resume playing
[F8]Fade out and stop
[F9]Slow playback
[F10]Fast forward
[ESC]End MMDSP
Do not press [←] [→] [4] [6] as these commands move the drive. (Even if you press it, it will just interrupt)
- Literatures used as references

https://github.com/kg68k/puni 立花えり子様のぷにぐらま~ずまにゅある
https://github.com/yunkya2/elf2x68k yunkya2様のクロス開発環境 elf2x68k
https://github.com/yunkya2/x68kserremote yunkya2様のx68kserremote - X68000(Z) Serial Remote Drive Driver


- History

2024/04/21
First edition

2024/04/29
Changed to utilize only joystick port #2. The first edition lacks hardware compatibility.

2024/05/09
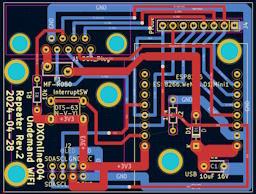
The printed circuit board was rebuilt.
X68000 reception speed has been increased.